Showing posts with label Gardening. Show all posts

7.20.2011

Container Garden 2011

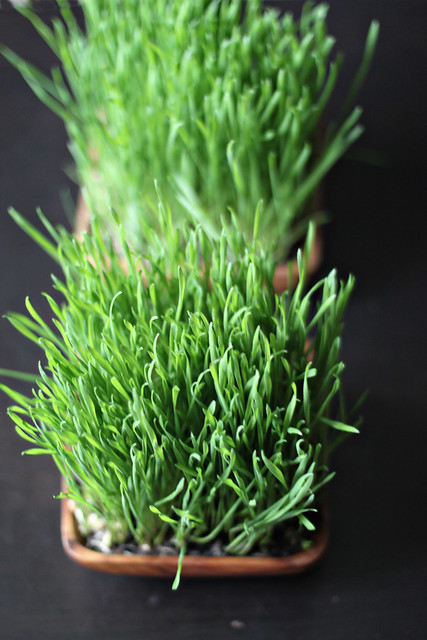
Oh, I long for the days when I will have a giant garden on a few acres of land, but alas, my house isn't selling and I'm working with what I have. This year we planted:

Jalapeno Peppers

Basil
Parsley (which thoroughly shadows Cilantro)
Cilantro (which clearly is not doing so hot)
and Tomatoes
The other day I was tending the plant and found what looked like rabbit poop on the leaves. I followed them up the plant and BAM, this little bastard was sitting there munching away on one of my tomatoes. Doesn't he remind you of the Hookah smoking caterpillar from the Alice and Wonderland cartoons? I think it's the little feet. You know you're going to google it. Anyway, he was literally about six inches long and the size of my thumb. Mike pulled him off (very reluctantly on the caterpillar's part) and put him on a tree about 15 feet away.
The next day however, guess who was back feasting. This time, I took him off, and walked across the empty retention pond about 100 feet away and put him on the ground at the base of a tree. Fool me once, shame on you, fool me twice, shame on me, come back a third time, and I'm not sure your removal will be as pleasant.

We googled this guy and found out it is a tomato horn worm. After it eats enough of my tomatoes it will turn into Mothra, with a wing span of about 5 inches. I found this moth last year and think it could be a tomato horn worm moth.


That about sums up my current adventures in gardening. What's everyone else growing this year? Any tomato horn worm sightings?

2.09.2011

Growing in the Winter

After eating some not so ripe strawberries this past week, I began longing for some fresh produce. But since I don't live in a place that supplies fresh year round produce and farmers markets, I have to make due with what's at the grocery store. However, there are some things that can be grown inside during the long frigid winter months. 

Mushrooms: We eat a lot of mushrooms; in lasagna, enchiladas, and pastas, so the thought of having fresh mushrooms is appealing. This shiitake mushroom log produces 1/4 to 1/3 pound of mushrooms every two months for about four years.

 
Shiitake Mushroom Log from Terrain

Wheatgrass: My only experience with wheat grass as a shot at Jamba Juice. But I can see how you can throw a little bit in a fruit smoothie and get the nutrients but hide the grassy taste.

 Grow your own wheatgrass: Via Vanilla & Lace

Sprouts: You can sprout all sorts of things; garbanzo beans, lentils, peas, barley, or Creed from The Office's favorite: mung beans.

Michael: Ok, Ryan, you told Toby that Creed has a distinct old man smell.
Creed: I know what's he's talking about. I sprout mung beans on a damp paper towel in my desk drawer. Very nutritious, but they smell like death.

So if you're a fan of alfalfa (Jimmy John's anyone?), you can sprout your own beans for a similar, delicious taste.

Sprouting Lentils: Via Honest Fare

I think I might try the lentils. Happy Growing!


11.10.2010

Saucey

As previously mentioned, I wanted to start canning vegetables this year. So after grabbing a bunch of tomatoes in season (we canned in September), we got to it:

We started with about 15 lbs of tomatoes


Clean the tomatoes and score an X into the bottom. This makes it easier to peel them.


Boil the tomatoes for about 2 minutes. The skins should slip off easily at this point.


Remove the core and seeds of the tomatoes


At this point, you can either leave them chunky or puree them for either canned whole tomatoes or tomato sauce. Fill each jar to about an inch from the rim (the ones below are a bit under filled). Place them in a boiling hot water bath for 25-45 minutes depending on the size of the jars.


Remove the jars with kitchen tongs or a sweet can grabber and let them sit for 24 hours. As they sit you will here little pops as the cans seal themselves. Make sure the cans are sealed before putting them in the pantry. We managed to produce about 5 jars of canned tomatoes and 4 jars of sauce.

Want to get all my Domestic Observances sent straight to your email? Enter your email in the box on the left that says "Subscribe via email". Or subscribe to posts here

9.08.2010

Canning


image via

My parents are pros at canning homemade spaghetti sauce, and keeping them on hand throughout the winter and to give as gifts. So, when my Mother in Law recently supplied me with a pristine condition pressure cooker and a box full of Ball jars and lids, I was excited to get started. My little veggie garden will not provide enough for me to can, except maybe if I can get a couple more cucumbers to grow. I can pick them when they're small and then make some baby dills (I picked up some pickling spices at Penzy's). So, instead I need to hit the farmers' market for a sufficient supply of in season veggies. For now I've been using the canning jars for homemade salsas like this. My Aunt and I are planning on hitting the farmers' market soon to grab a bushel of ugly, delicious ripe tomatoes to make "sauce" and maybe some other veggies (roasted red peppers?) if we're feeling adventurous. I'll let you know how it goes...

Links:

Ball's "How to Can" Videos

Make your own canning jar labels


Want to get all my Domestic Observances sent straight to your email? Enter your email in the box on the left that says "Subscribe via email". Or subscribe to posts here

8.05.2010

Whole Wheat Penne with Creamy Pesto

The basil is growing beautifully and although we've been using a few leaves here and there for some regular recipes, I figured it was time to use it for something that would use up a substantial amount of the proliferating herb. Of course, nothing uses basil like pesto. Classic pesto always comes across a little harsh for me, so when I found this creamy version concocted by chef Rocco DiSpirito in Mike's Runners' World, I thought I'd give it a go.


-2 cups basil

-1/2 cup Parmesan cheese

-1 cup sour cream

-2 tablespoons pine nuts

-3 cloves of garlic

-small handful flat leaf parsley

-salt and pepper to taste

In a food processor (I rock the magic bullet), combine all the ingredients and pulse until smooth and creamy. This recipe makes enough pesto for 3/4 to 1 pound of pasta

Want to get all my Domestic Observances sent straight to your email? Enter your email in the box on the left that says "Subscribe via email". Or subscribe to posts here

7.29.2010

Container Garden Progress

Remember my little container garden? Well it's progressing nicely, so I wanted to share. We never got around to adding the missing tomatoes and cilantro, as I've been trying to fill up every spare minute this summer before I start my nursing program, so here is what we're working with:


These are the beginnings of our yellow squash. No vegetables yet, but I know these are the first step (which I think is pretty amazing by the way)


This is the most awesome cucumber ever (and the only one that's really starting to get some meat on it)


Here is the first Serrano pepper that grew. It was way ahead of the pack. It sat fully formed on the vine before any other ones started to sprout. Now, there are at least a dozen tiny little Serranos sprouting from all the leaves of the plant


The basil is proliferating of course. I've always been told they grow like weeds. It forms a pretty little star shape, that has also overshadowed the parsley, making their competition for sunlight severely one sided.

One of the things that helped tremendously with the proliferation of our little garden is the use of natural fertilizer. Fish emulsion is an organic liquid fertilizer made from byproducts of the fish oil and fish meal industry. Fish emulsion is appropriate for many uses in the garden, but is especially useful to feed leafy green vegetables, due to its higher nitrogen content.

5.24.2010

Container Gardening - Part II

I mentioned in this post how excited I was to plant my container garden. Well, finally, after two months of talking about and too many busy weekends to do it, I've planted my little garden (with help from Mike). It's nothing compared to the spectacular home gardens cultivated by my friends and family, but it's my own little home grown farmer's market, so I'm excited nonetheless.

To start out, Mike and I headed to Lowe's and grabbed two of these babies. This is the same soil that's in my compost bin.


We also grabbed three of these large neutral planters to make a nice symmetrical little garden on the corner of our little patio.

Although I originally intended to grow:

  • Cherry Tomatoes
  • Lettuce (such as Black Seeded Simpson)
  • Green Onion
  • Chive
Plus
  • Flat Leaf Parsley
  • Basil
The availability at the store and Mike's general enthusiasm, led us to choose:

  • Cucumbers
  • Serrano Peppers
  • Yellow Squash
  • Basil
  • Parsley
also...
  • There were no lettuce plants,
  • We forgot to grab the cilantro
  • There was a green pepper plant in the tomato crate
So, we'll have to head back to the store and grab the cilantro and tomatoes, and we planted the green pepper anyway. All the plants we chose were Bonnie Plants of the "plant the pot" variety, which makes it quick and easy to plant.


(Click the picture for a closer look)

So here's my little garden, isn't it cute? Mike joked that the squash plant will probably only produce one little squash, but it will be the best squash ever.

Don't be shy readers! Post a comment or link below about your experiences with gardening. Just click the word "comments", write your comment, choose if you want to post with a Google account, just your name or anonymously, and click publish.

P.S. Want to get all my Domestic Observances sent straight to your email? Enter your email in the box on the left <----. Or subscribe to posts here

5.18.2010

Compost This

So to help fertilize my garden, and to achieve my goal of taking out the garbage once a month. I decided to start a compost bin. Now this is no easy task is I live in a 1400 square foot townhouse with a 10x10 concrete patio with a little bit of grass that I can't really touch. So I spent some time perusing the internet in hopes to find a nice small compost bin that would work. There were some nice options out there:


This was not a bad option, but I was not stoked about the $200+ price tag

This one's cool because it looks like a cannon, but it's even more expensive topping out over $300

This one is just great because it looks like that giant ball from The Incredibles, but it's still a bit in your face as far as size and shape.

So I googled "make your own compost bin" and found this great how to. I also stumbled across a similar tutorial that uses the same "how to" over at one of my favorite blogs; Young House Love

Here is the tutorial


Recycle or buy a plastic pail/bin with a tight fitting lid about 24 inches tall or taller.


With a drill, drill 8 to 10 small holes in the bottom of your container for aeration purposes. 
Sorry no image, Mike did this part really quick while I made dinner


Place some shredded newspaper or dry leaves on the bottom of your compost bin, fill about 1/8 - 1/4 full.


Since we live in a townhouse with a lawn service and because it's May, we were out of luck on getting any leaves, but we made due with some shredded paper (the recycling company hates to take this when we put it in the recycle bin)


Place dirt from your garden on top of the newspaper, until your compost is 1/2 full.


Again, living in a townhouse, I had no extra dirt lying around. The tiny bit of soil that I do have is reserved for my hostas. So, I grabbed this at Home Depot planning on using whatever was left for my container garden.


Place your compost bin in a shady area away from your home in the back yard. If you live in an apartment or have no backyard you can place your bin on the patio. Be sure your compost is not in full sun or your compost will dry out


Now, place any food scraps or paper products into compost such as fruit, vegetables, crushed egg shells, paper towels, etc.


I started this little guy going under the sink in order to have some scraps ready to go.


(Boo forgetting to eat a pound of organic spinach and having it spoil in the fridge)


Give your compost a little stir with a shovel or stick, making sure to cover your food scraps with dirt


Spray with lukewarm water until moist, but not soaking wet.
I chose to forgo this step as I started with moist soil


With a drill make 8 to 10 small holes on bin lid.


Place lid on compost, every other day you add food scraps to bin you should give it a stir. Mixing the compost will help breakdown the scraps faster.


It may not be the prettiest place for a compost bin, but at least it kind of blends in with the grill and the gigantic patio box


Wait 2 - 3 months to use your compost. Compost can be used as mulch to cover flower beds, as potting soil and sprinkled over your grass as a lawn conditioner. Don't use it all though, save at least 1/3 of your original compost and then you can start all over again.

4.20.2010

Container Gardening


I'm very excited to plant a container garden this year. Last year I planted some basil and flat leaf parsley that was dried up within a few weeks because I forgot to water them consistently. That's my problem; consistency. Anyway, I've been doing a little research over the past few weeks on the types of vegetables that will grow well in containers and have narrowed it down to:

  • Cherry Tomatoes
  • Lettuce (such as Black Seeded Simpson)
  • Green Onion
  • Chive
Plus
  • Flat Leaf Parsley
  • Basil
It's not that much but it's still very ambitious, as I'm not sure how well everything will fair on the very sunny patio, plus my problem with consistency, also my fear of spiders...

I still have a few things to consider in regards to soil and fertilizer. I need soil and fertilizer/compost. I haven't started my own compost yet so I'll have to stick to the store bought. Below are a few ideas to make my little container garden not only functional, but stylish too


I can't forget some sweet wellies for muddy spring days


Related Posts Plugin for WordPress, Blogger...